> ## Documentation Index
> Fetch the complete documentation index at: https://docs.directenergypartners.com/llms.txt
> Use this file to discover all available pages before exploring further.
# Network
To integrate the Power Platform controller into your local network, you need to change its default IP address to a static IP address on your network,
as well as modify the controller’s subnet mask and default gateway. This section provides detailed instructions on how to configure the network settings
of the controller using the Web-Based Management (WBM) interface.
To change the network settings of the Power Platform controller, follow the steps below:
### Change Network Settings
Login to the Web-Based Management (WBM) interface of the Power Platform controller.
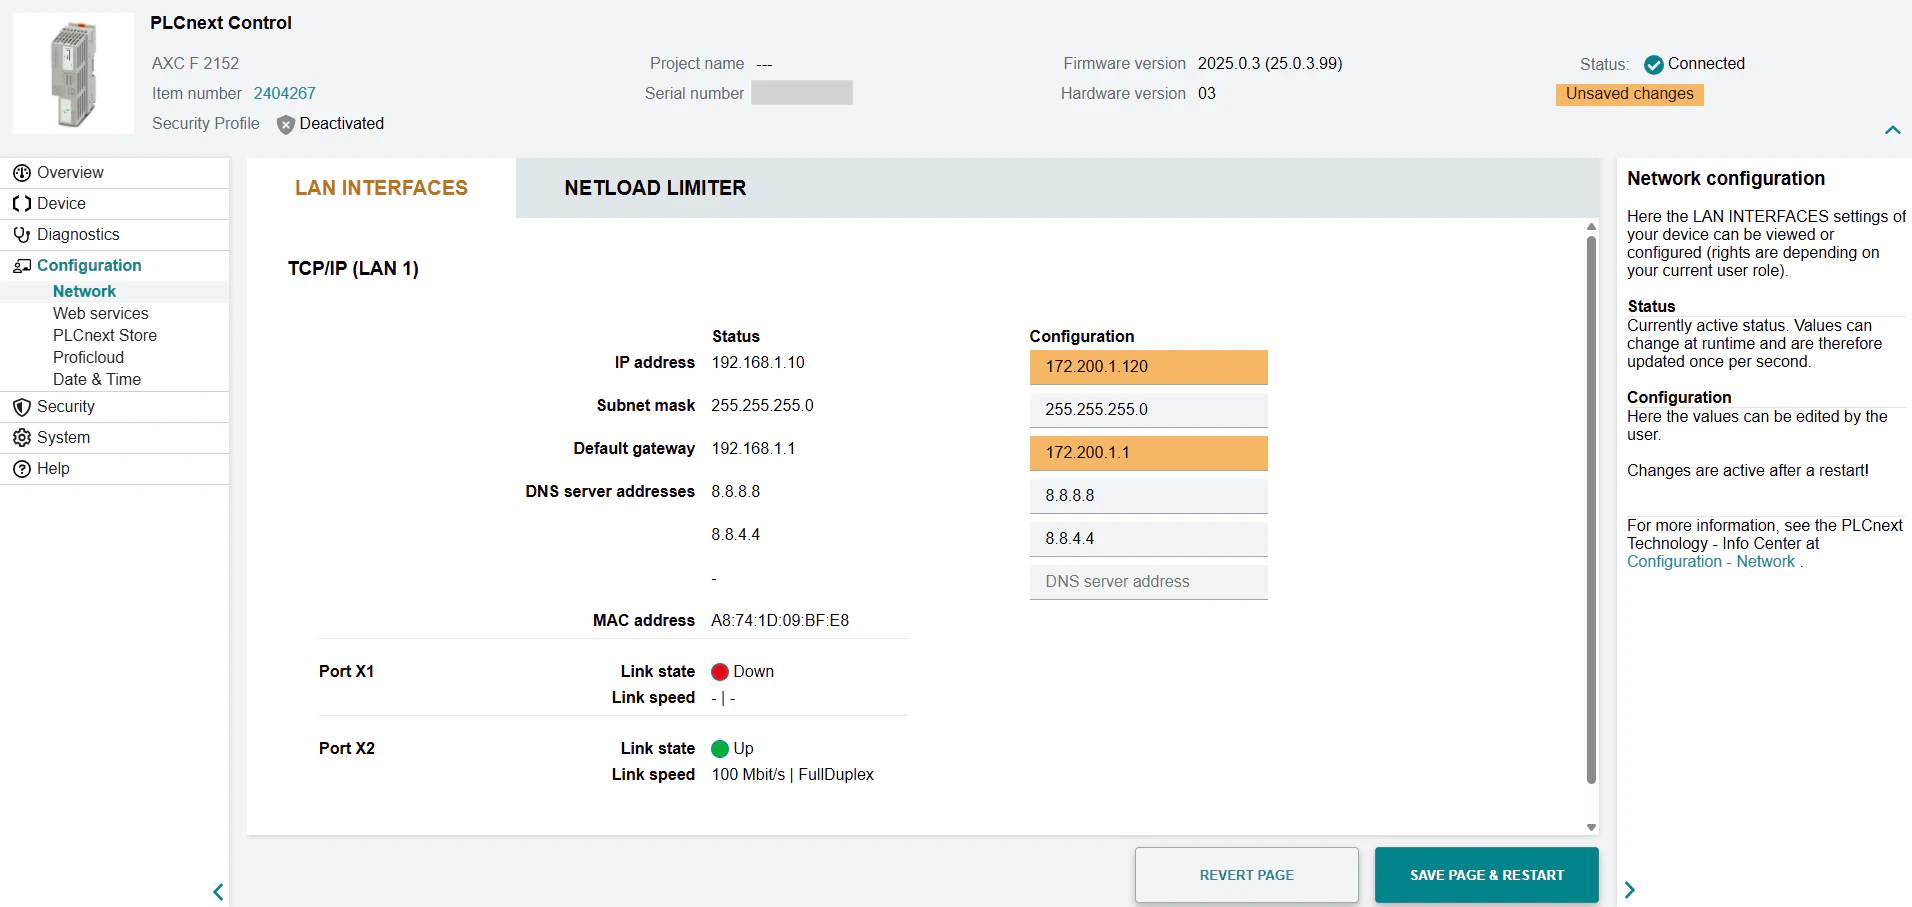
Navigate to the **Configuration** tab in the left navigation plane and select **Network**.
Update the IP address, subnet mask, and default gateway to match your local network. **For example:**
* IP address: `172.200.1.120`
* Subnet mask: `255.255.255.0`
* Default gateway: `172.200.1.1`
Click **Save Page & Restart**. The controller will reboot with the new settings and become visible on your local network with the newly set IP address.